Integrations
Every line on the system must be assigned a PBX integration template. This template defines how the line interacts with the telephone switch to which it is connected: to accept calls, to make calls, to transfer calls, and so forth. For analog and digital systems, several templates have been created for many popular PBX switches and are provided on the system for your convenience. For SIP systems, there is typically just one template that is created for you by the Setup wizard.
There is also a Generic PBX template (for SIP systems, it is called SIP) that is configured with a number of generic settings and can be used as a basis for creating a new PBX template if the switch you are using is not included in the list. It is recommended that you not assign the Generic template directly to any lines but instead make a copy of the template (as described later in this section), give that copy a meaningful name based on the name of your switch, edit its settings to integrate properly with the switch, and then assign that new template to the lines.
Do not worry about making changes to any of the default templates provided by the manufacturer. All such templates are stored in a separate directory, from which you import them into the active template directory. It is the imported copies that you are editing. If you make changes to a template that cause serious problems, you can always revert to the factory default settings by re-importing that template over the top of the corrupted version.
For SIP-enabled systems, it is recommended that you use the template created for you by the Setup Wizard and then make any necessary changes to that template. If the template becomes unusable for any reason and you need to replace it, you should re-run the wizard to create a new template.
This section is strictly about call handling. If you are looking for information about passing name changes, call restriction settings, maid codes, and the like to and from the PBX in a hospitality setting, via a serial or TCP link, refer to the PBX Links section.
Template Manager
Selecting Telephony | Integrations opens the template manager, shown below:
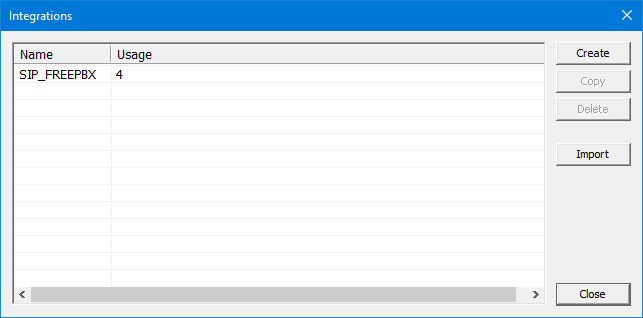
The table on the left lists all templates that have been imported into the active list. For each such template, it lists the template name, the number of ports currently using that template, and the date and time when the template was last modified. Along the right-hand side of the dialog are a series of buttons allowing you to edit, copy, delete, create or import templates, as well as a button to close the dialog.
Create a Template
Click New to create a new PBX template from scratch. This will open the Integration Template Editor with the Save button disabled. After you have configured all the settings as desired, click Save As to give the new template a name and save the file. It will then appear in the active list and you will be able to assign it to any line.
It is generally recommended that you create a new template using the copy method instead. For analog and digital systems, you can copy from the Generic template and then edit as needed. For SIP systems, you can copy from the SIP template.
Copy a Template
Select a template from the list and then click Copy to make a copy of an existing template. This will open a dialog in which you can enter the name for the new template, as shown below.
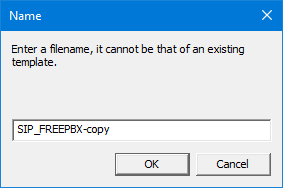
Enter the new filename (do not include the file extension; that will be added automatically). Click OK to make the copy or Cancel to close the dialog without copying the template.
Delete a Template
Select a template from the list. If the Used field is greater than zero, the delete action is not available. You cannot delete a file that is in use by even one port.
However, if the Used count is zero, then you can click Delete to delete the template. The system will prompt for confirmation; click Yes to delete the file or No to cancel the action. This will only delete the file from the active list; it will not affect any factory default templates.
Import a Template
For non-SIP systems, several templates for a number of popular switches are provided by the manufacturer for your convenience. By default, all of these templates are kept in a special directory where you cannot access them directly. Instead, you must import into the active list any template file you wish to use.
This separation has two advantages. First, it keeps the active list uncluttered because only the templates you have imported (and, presumably, are using) are shown in the list. That makes it easier for you to find the template when you want to edit it or to assign it to a port. Second, it ensures that for any factory-supplied template, there is a default copy you can revert to if the active copy becomes corrupted or is otherwise unusable. In such a case, you simply re-import the original copy over the top of the corrupted copy.
Click Import to open the Import Integration Template dialog.
In the table view, select the template(s) you want to import (using the Ctrl or Shift key to select multiple templates) and then click OK to import them. If you already have a copy of the template in the active list, you will be prompted to confirm that you wish to overwrite it. Click Yes to do so or No to cancel the action.
To close the dialog without importing any templates, click Cancel.
For SIP-enabled systems, there is only one default template, a generic template called SIP. This is because on SIP-enabled systems your PBX template is automatically created for you by the Setup Wizard based on your selections within the wizard. The import feature is thus more useful for non-SIP systems.