Testing
The VeMail Test Client was designed and included for use in testing SMTP and POP3 settings for VeMail configuration.
Testing SMTP
The application initially displays the form for testing SMTP:
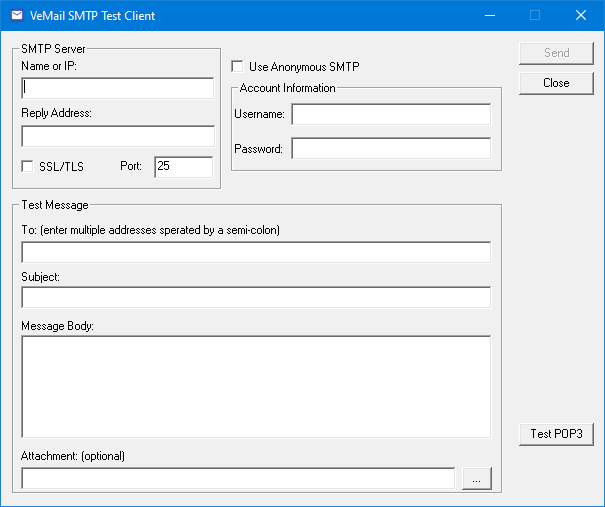
This form includes the following fields for you to fill out:
| Field | Description |
|---|---|
| Name or IP | Enter the SMTP server name or IP address. |
| Reply Address | Enter the email address to which replies should be sent. Used by the Reply-to-Delete feature. |
| SSL/TLS | Check this box if the SMTP server requires the use of SSL/TLS for encrypting message traffic to and from the server. |
| Port | Enter the port number used to connect to the SMTP server. Default is port 25. |
| Use Anonymous SMTP | Check this box to use anonymous SMTP. |
| Username | Enter the account username for the VS, if not using anonymous SMTP. |
| Password | Enter the account password for the VS, if not using anonymous SMTP. |
| To | Enter one or more email addresses to send the test message to; use a semi-colon to separate multiple addresses. |
| From | Enter the sender's email address. |
| Subject | Enter the subject line for the test email. |
| Message Body | Type your test message here. |
| Attachment | To test sending an attachment, click the button to the right of this box (labeled with three dots). In the File Open dialog, navigate to the folder with the file you want to attach. Select the file and click OK. |
When you have finished configuring the message, click Send to actually send the message. A dialog will open, showing the raw SMTP data. Receiving this data can help you troubleshoot if the send attempt fails. When you have finished viewing this data, click Close to close the dialog and return to the main window. The settings you previously entered will still be there. So, if the send failed and you think the failure is due to an incorrect setting, you can modify the settings and try again.
Test POP3
After you have successfully sent a message via SMTP, you are ready to test the POP3 side. Notice the button in lower right corner, Test POP3. Click this button to open the VeMail POP3 Test Client dialog, as shown below.
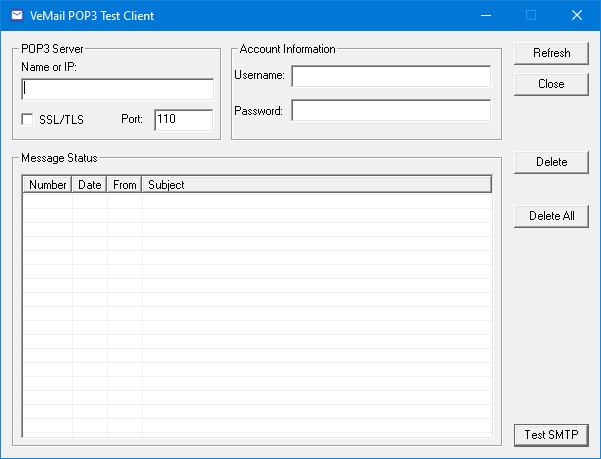
Once again, you will need to enter the following settings:
| Field | Description |
|---|---|
| Name or IP | Enter the POP3 server name or IP address. |
| SSL/TLS | Check this box if the POP3 server requires the use of SSL/TLS to encrypt message traffic to and from the server. |
| Port | Enter the port number used to connect to the POP3 server. Default is port 110. |
| Username | Enter the username for the account to which you sent the test message. |
| Password | Enter the password for the account to which you sent the test message. |
Click Refresh to retrieve all messages in the account you specified. Each message is listed on a separate row in the Message Status table. For each message, it will list: a number, the date and time the message was received, and the From and Subject lines of the message.
Click OK to close this dialog.